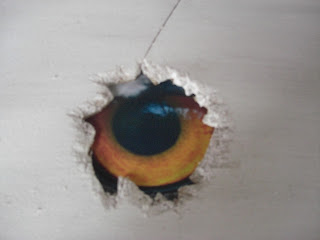
I didnt want a frame or anything visible on the front of the image like pins to hang the photos.
Mount board can look tacky so im trying embedding the images into the wall before i look at other methods. I think this method where it make the image part of the fabrication of the building, reflects onto how animals have adapted to have humans have changed the world
tried experimenting with each image and the shape of the hole. this one was cut into to make a basic ragged shape, and then chiseled down to make it appear as though the hole had been ripped out.
Each of the boards was painted white to replicate the gallery wall.
This board was Chip board
Ragged shape without chiselling. chipboard. dont like this looks too deliberate
This is a circle hole on chip board. image was too small to make same effect as the other 2. it was also found the images look better if they are a few cms behind the surface of the board. So be better if they were mounted. Maybe in a picture frame and using that seperate the image from the board so the picture frame is sandwiched
Experimented moving the image further back to see how thick a frame i would need if i used this idea.
this is too far back. chipboard
This time the image was further forward but this time using MDF. the paint doesnt take well to MDF. better on chip board
Just experimented with a ragged shape on the mdf to see what it looked like
The first image combined with shape that been chiseled down on chipboard works the best
After id confirmed this, i tested the arrangement (how many prints and how they should be hung) in my sketchbook through ripping the paper
Decided that one image per board in a triptych style look better


No comments:
Post a Comment